Google Consent Mode is simple and powerful solution to track users' privacy preferences and standard way. Given this is a low-level framework there is few things that still require manual wiring and configuration, one of them is improving tags firing sequences as described below. If you need more introduction read our article:
In order to make it work with other Consent Management Platforms ensure the Consent Mode state is first set and then there is additional consent_update event pushed to the dataLayer.
Use this preset together with native GTM consent mode features that are described in this guide.
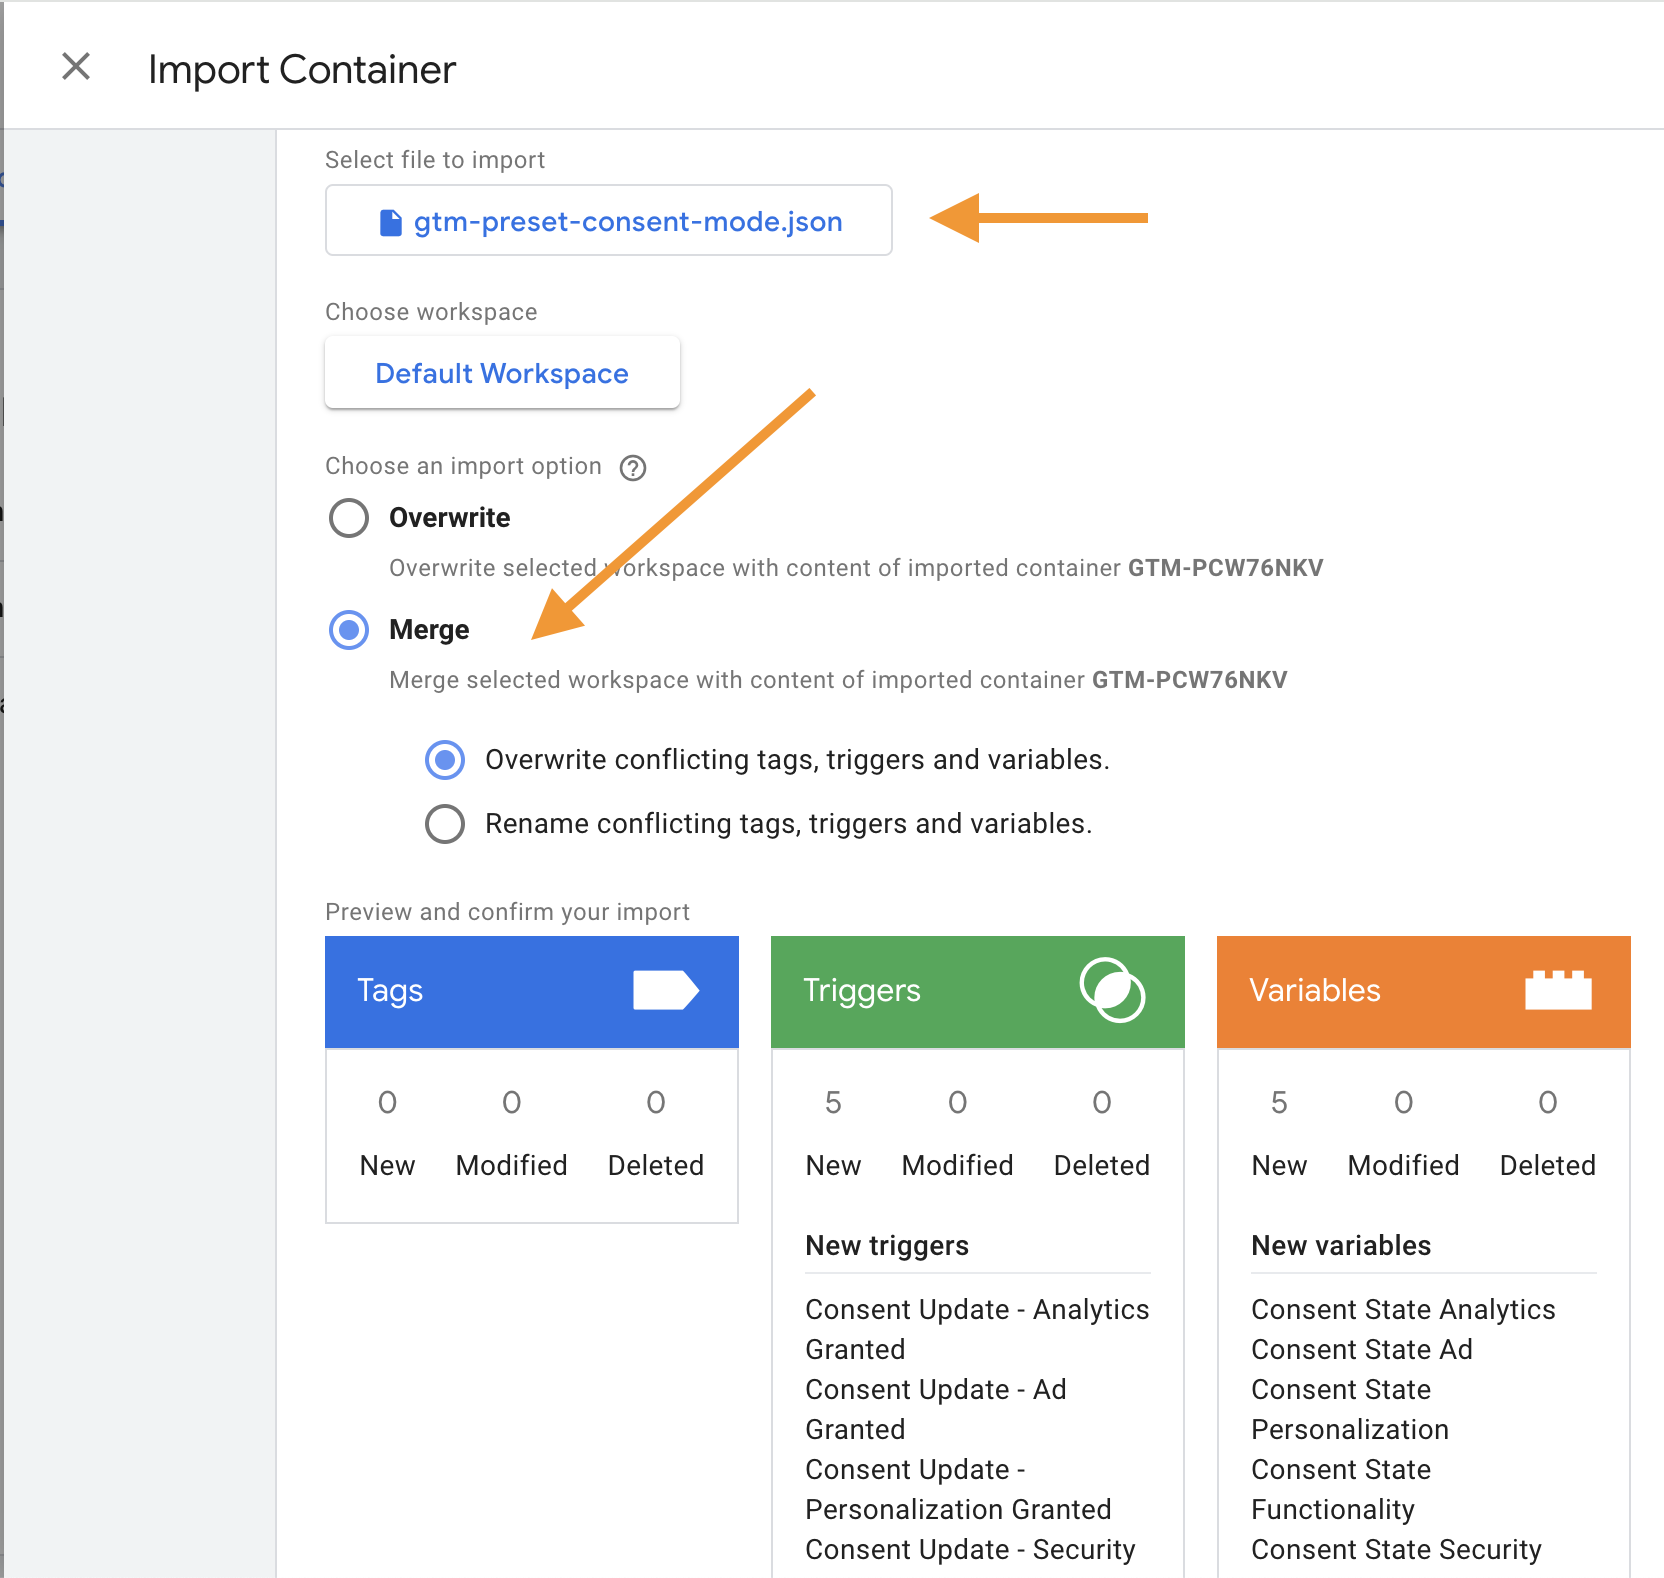
1. Download & import the Consent Mode Triggers preset
Navigate to WP Admin > Settings > Google Tag Manager and then GTM Presets tab. Find Consent Mode Triggers preset and download it.
Then go to Google Tag Manager workspace and select Admin. Then click Import Container and follow our general guide for importing presets.
2. Replace triggers for selected tags
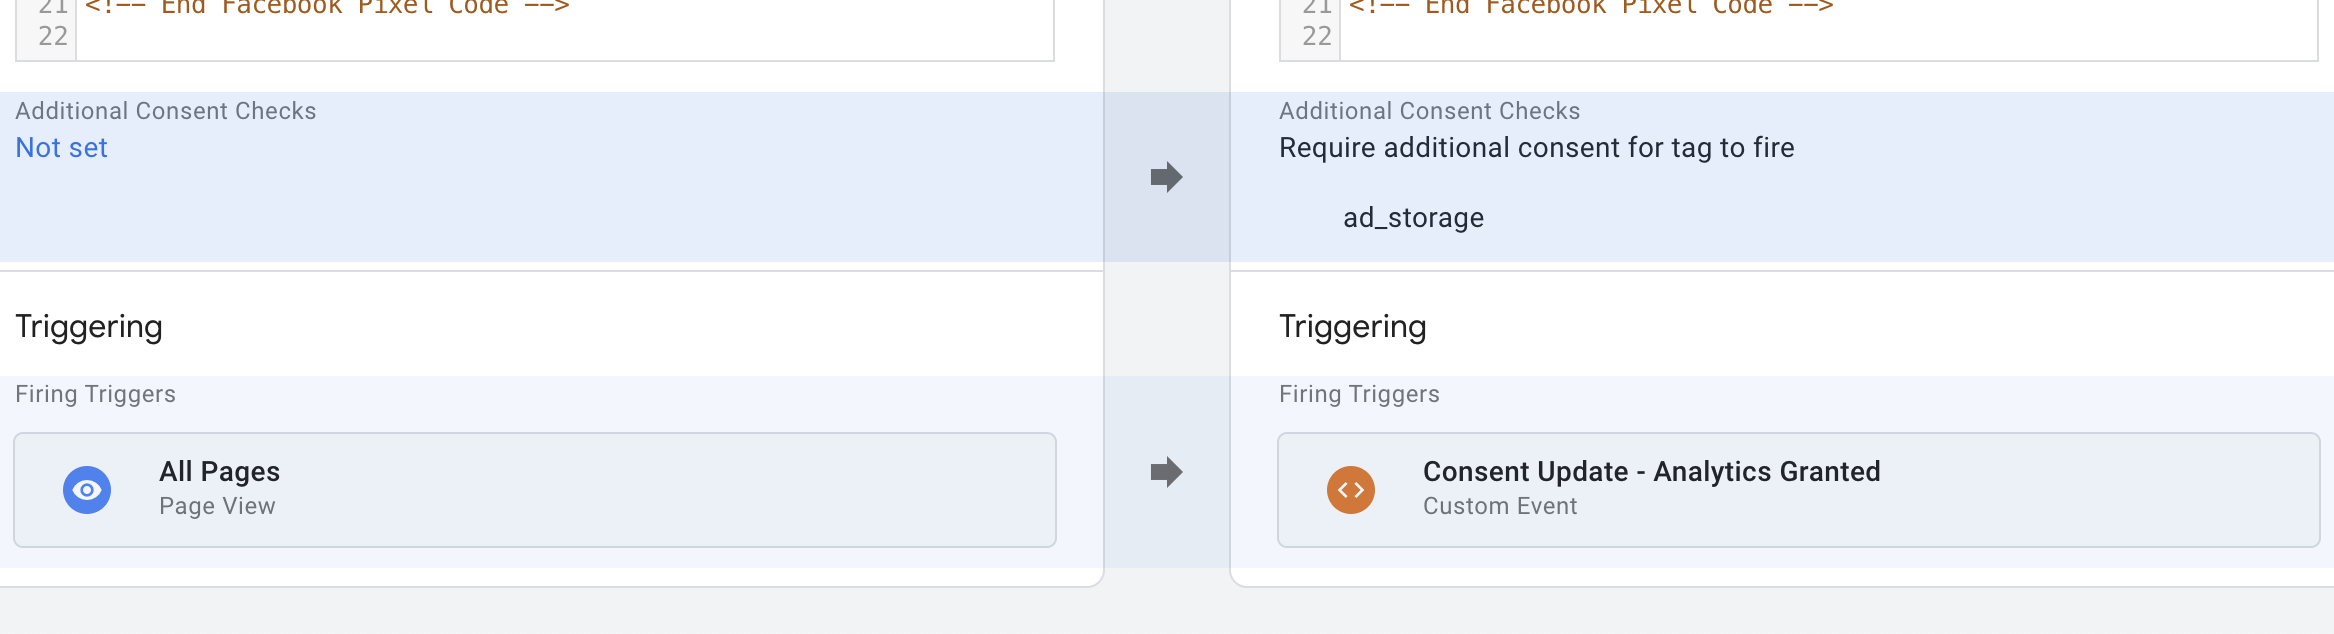
One the preset is imported you can use any of the following new triggers:
- Consent Update - Ad Granted
- Consent Update - Analytics Granted
- Consent Update - Functionality Granted
- Consent Update - Personalization Granted
- Consent Update - Security Granted
Those triggers will fire as soon as specific consent type is granted. When using our Consent Mode Banner plugin it can be safely used as replacement for All Pages - Page View trigger.
Use it together with setting Additional Consent Checks.