General guide on importing any of the GTM presets for any eCommerce plugin.
This is a general guide on how to import Google Tag Manager preset provided by Tag Concierge GTM presets library. To learn more about what the preset is please check this document.
1. Download selected preset
Before loading a preset you need to obtain and install a dedicated eCommerce plugin. The plugin settings are the only interface to download supported presets.
IMPORTANT: the list of available presets depends on the version (FREE vs PRO) of the plugin that you use.
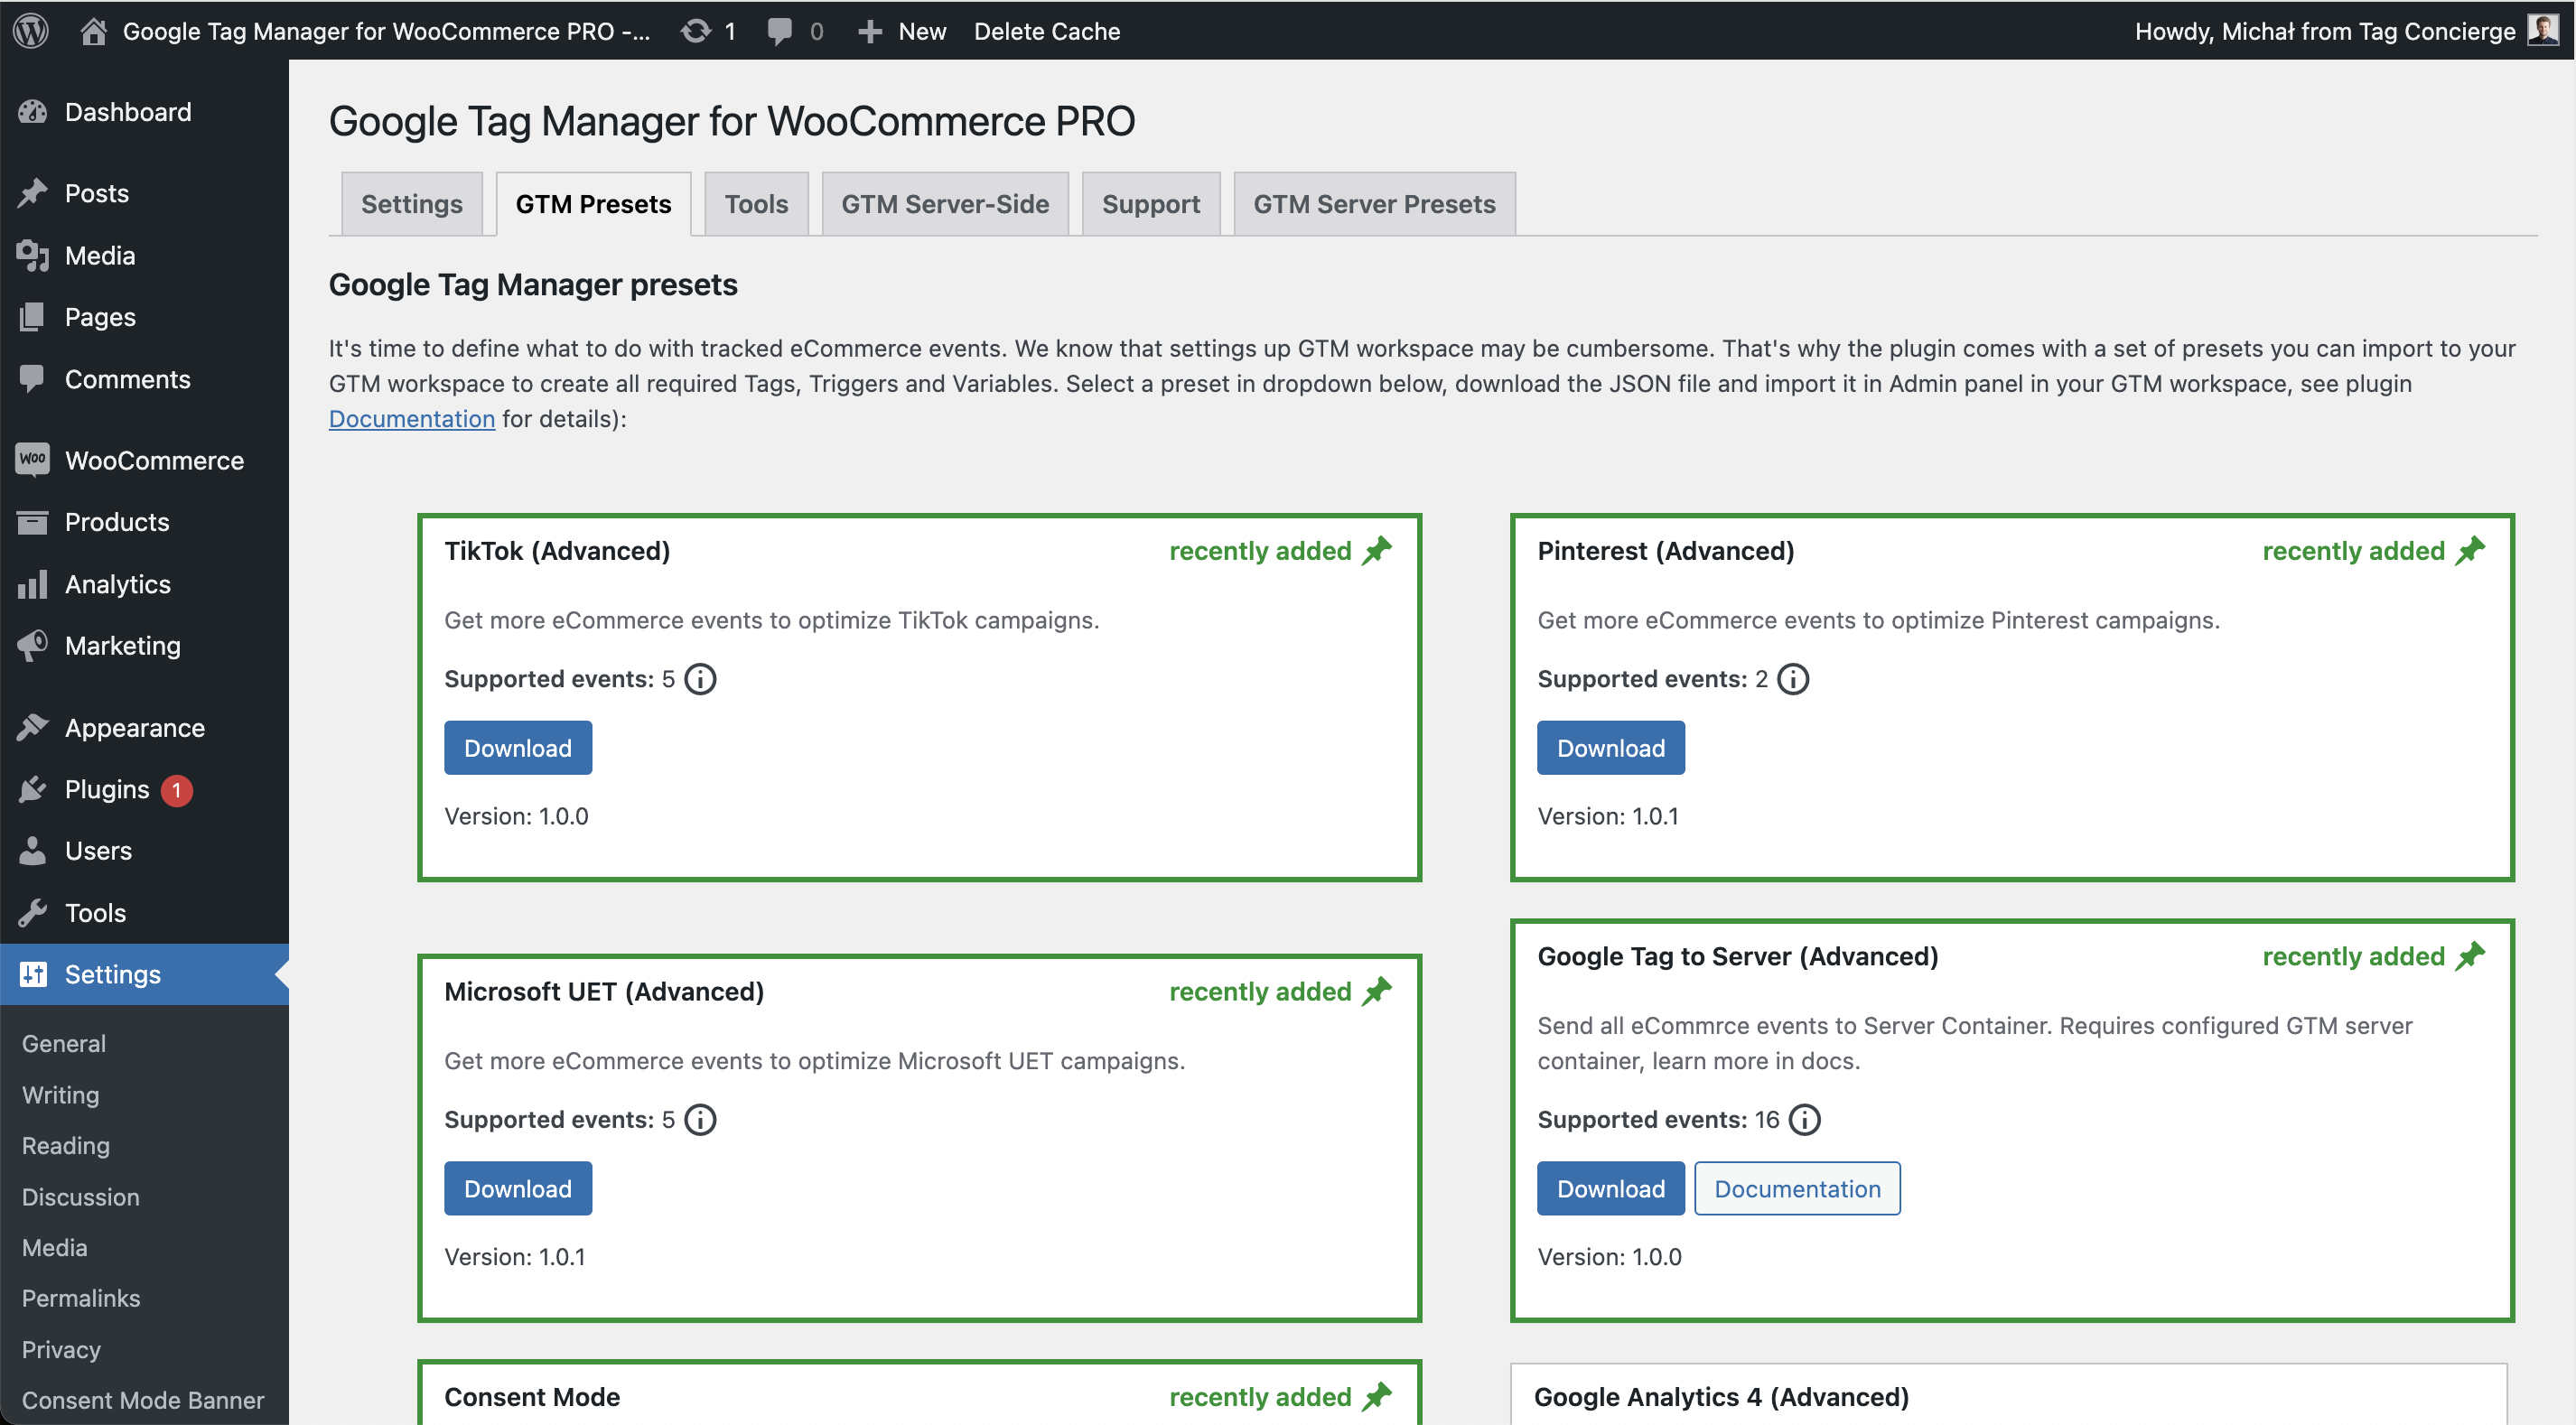
For instance for GTM for WooCommerce navigate to your WP Admin section. Then go to **Settings** > **Google Tag Manager** and click **GTM Presets** tab. This will show a grid of presets available for the given eCommerce plugin version.
In PrestaShop addon, you will find presets in GTM Presets tab.
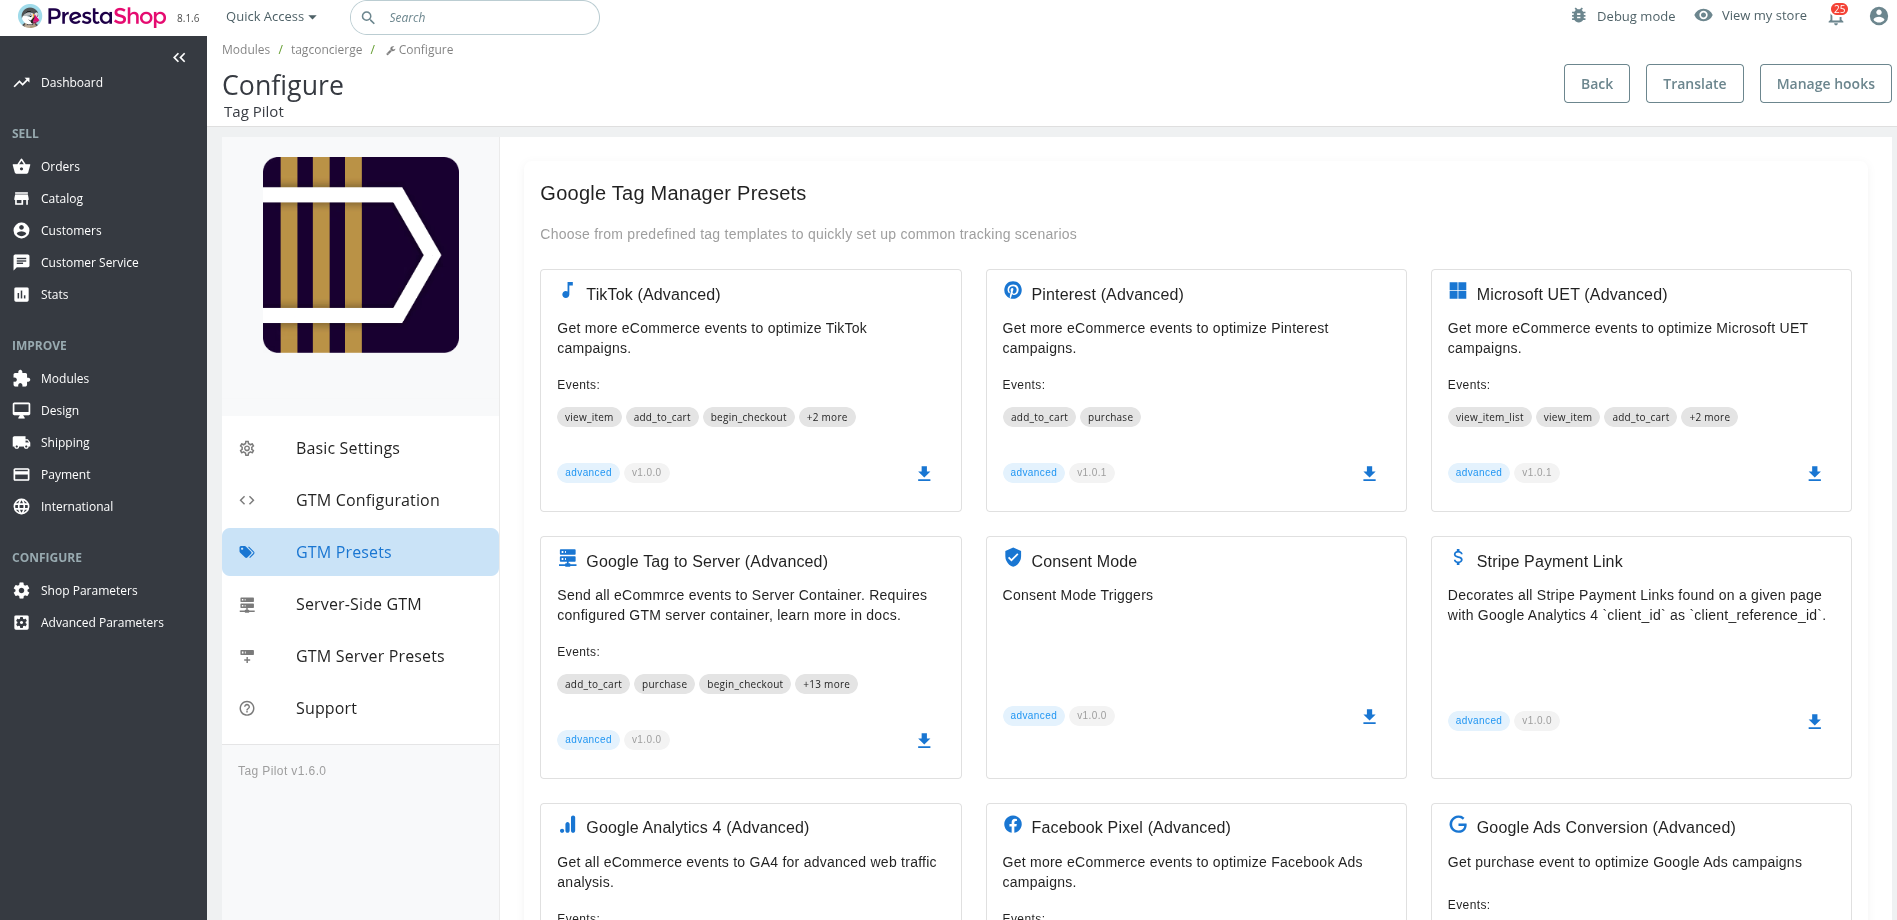
Find the preset that you want to use and hit **Download** button to get dedicated JSON file.
2. Import preset in Google Tag Manager
In Google Tag Manager go to the **Admin** tab within your workspace. Click **Import Container** . Choose the container file you have downloaded in previous setp. Decide which workspace it should be imported to. Then select **Merge** and **Overwrite conflicting tags, triggers and variables.** as import options - this is crucial part of the import step and selecting other options will yield unexpected results.
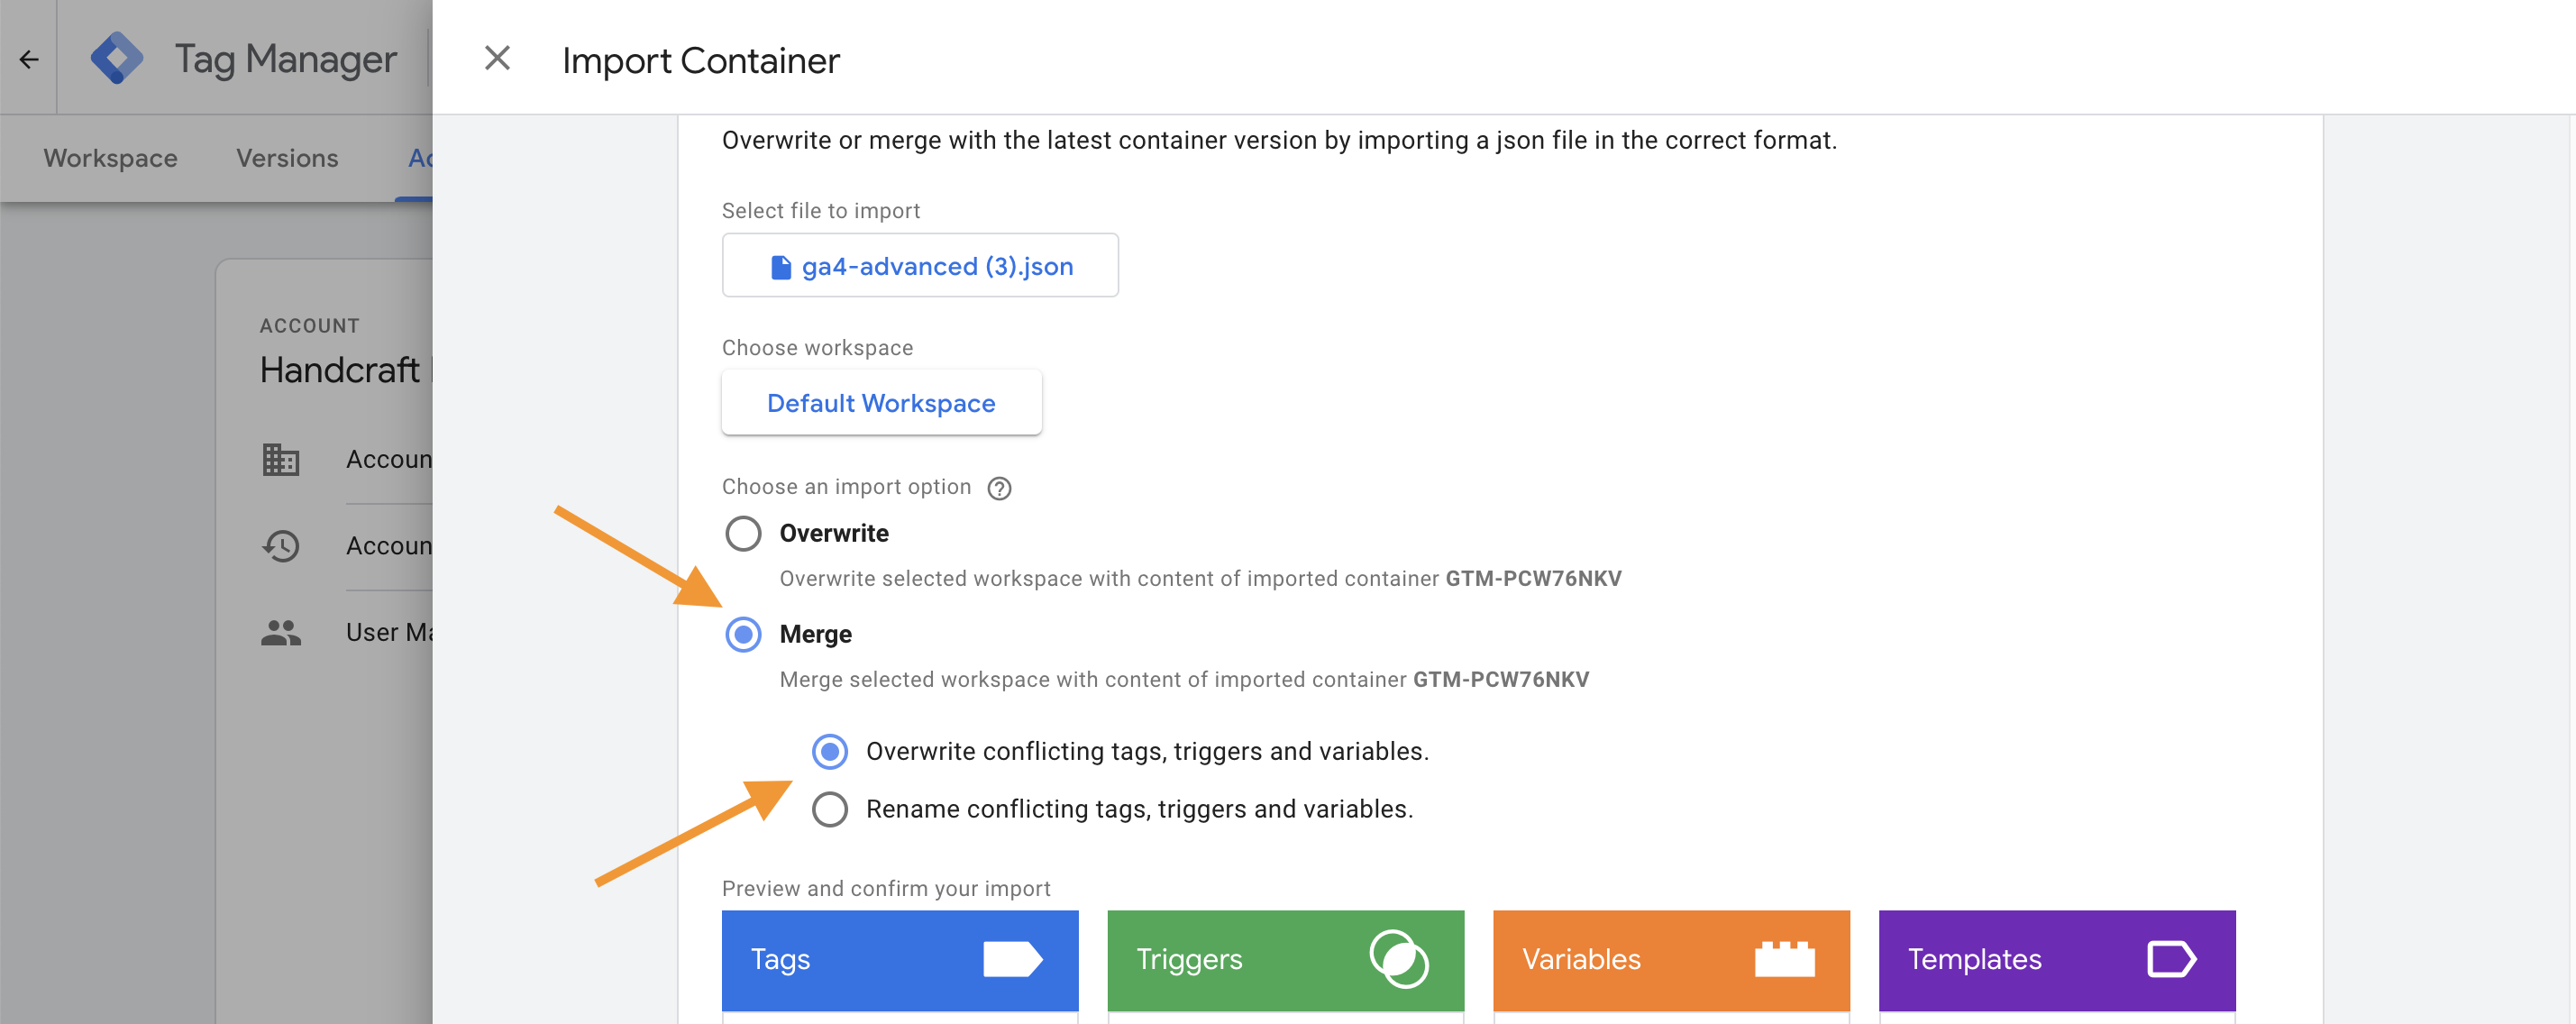
Once you are sure you have the correct options selected hit **Confirm** to create all required Tags, Variables, and Triggers.
3. Review the changes and publish it
When the container preset is imported those changes will be applied to your GTM Workspace, but they won't be deployed to end-users yet. This allows you to review all changes and apply any required modifications before publishing to the production page.
To make things easier to manager, all Tags, Triggers and Variables from a given preset are assigned to a dedicated **Folder** with the name of the preset (some presets may create two folders if their setup is more complex).
Most of the presets will require at least one manual change which is setting an ID of the service to integrate with (**GA4 Measurement ID** or **UA Settings** ). You will usually find them as one of the **Variables** , but please check dedicated documentation of the preset.
Once all the required changes are done you can hit **Submit** , provide description of your change (that will help auditing changes later on) and that's it!
Your new GTM integration is live now!