Google Ads Dynamic Remarketing is an advanced way to engage with visitors and customers of your eCommerce shop. In this scenario you can leverage precise behaviour data sent to Google Ads to target your audience with personalised ads maximising conversion rates.
Prerequisites
This setup is more complex and involve additional integrations. Before starting implementing Google Ads Dynamic Remarketing GTM Preset ensure that you are ready with following:
Google Product Feed integration
In order to serve dynamic, personalized product ads you need to synchronise your PrestaShop listings with Google Product Feed. There are different solutions to perform this integration but one to consider is to use a 3rd party modul. Before proceeding ensure that you have your products loaded into Google Product Feed and you know what is the ID of those products. This will be key in the 1st step of the guide below.
Steps
Here are 5 steps that needs to be performed to get Google Ads Dynamic Remarketing setup up and live.
1. Adjust tracking parameters
As mentioned before Dynamic Remarketing requires getting PrestaShop products loaded into Google Product Feed - when products are loaded they are assigned a given ID - some popular PrestaShop modules providing this functionality prepends the PrestaShop ID with a custom prefix. This is why an adjustment in tracking needs to happen. Additionally, Google Ads requires additional tracking parameter called "google_business_vertical" to be present on tracked products.
Tag Pilot for PrestaShop offers dedicated hook for Google Ads Cart Data that will take care of populating required parameters.
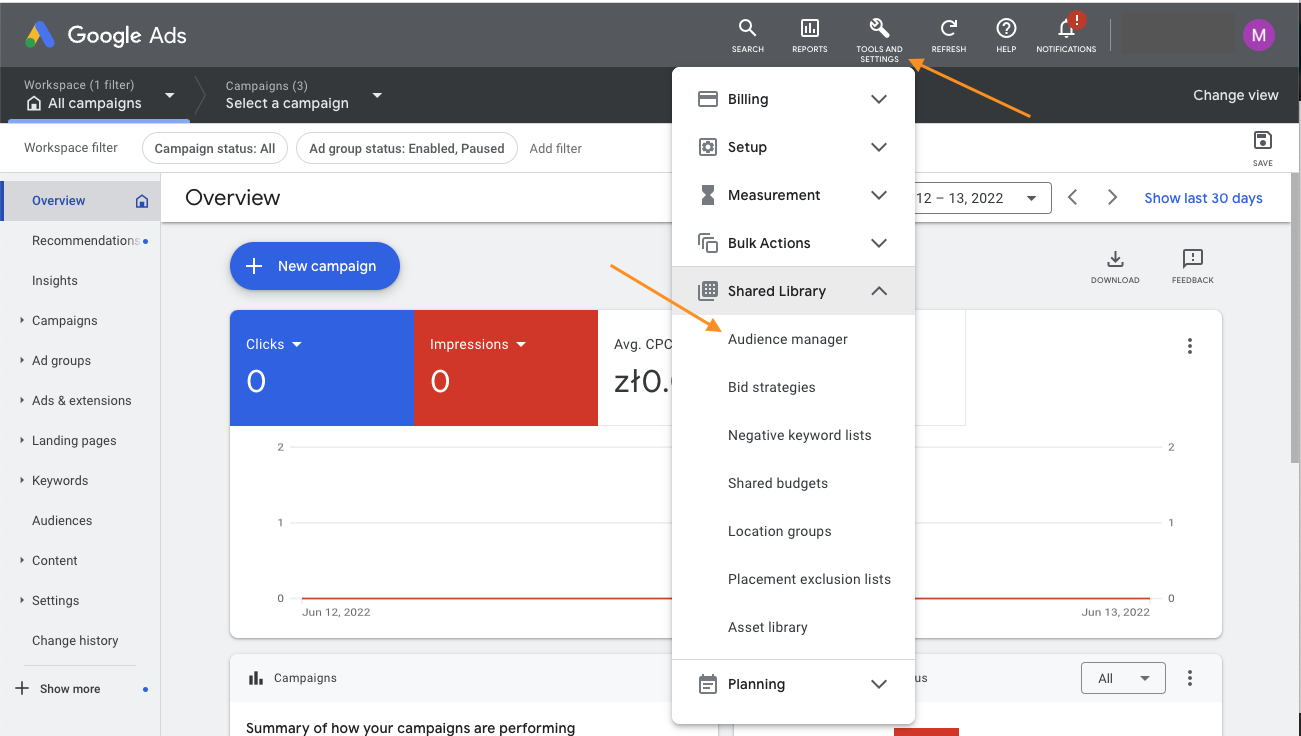
2. Configure and obtain audience source Conversion ID
Once the required parameters are defined, not it's time to obtain the Conversion ID that will allow to send data to Google Ads and build custom audiences there.
First navigate to Audience Manager. You can find it in Tools and Settings > Shared Library:
In Audience Manager select Your data sources and Google Ads tag. At the bottom of that screen find "Tag setup" section and select "Use Google Tag Manager":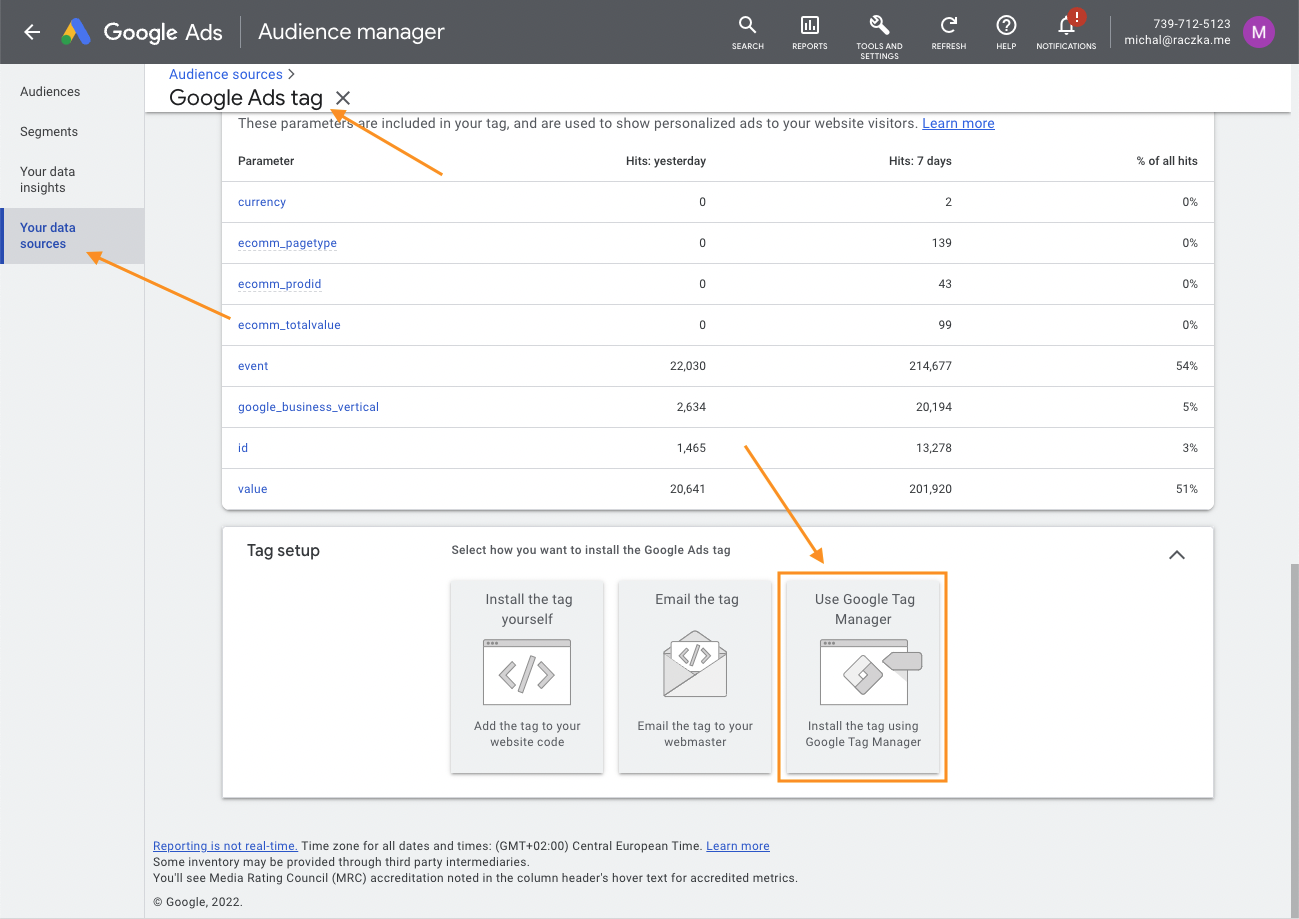
It will open up another section with Conversion ID. Copy this value.
3. Install GTM Preset
With Conversion ID now it's time to import the Google Ads Dynamic Remarketing preset. Please follow the general guide here.
Don't publish the preset yet.
4. Set the Conversion ID
Once preset is imported, before publishing it find Variable called "Google Ads Dynamic Remarketing Conversion ID". Open it:

Edit the value of this Constant Variable and past the Conversion ID obtained in step 2 above.
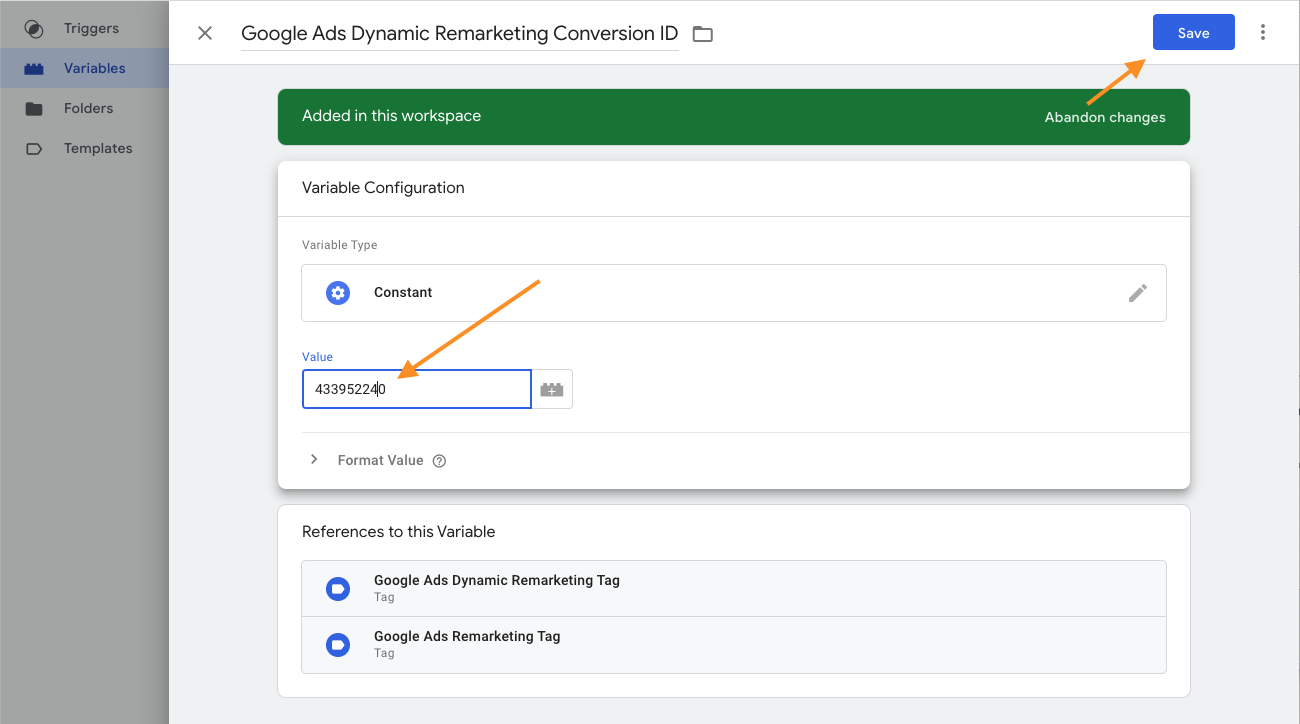
Save the changes.
5. Publish the preset
Review the GTM workspace. By default the remarketing tag is triggered by ecommerce events prior to purchase, you can adjust it now.
Once you are good you can publish your changes.
If other elements of you setup are correct (including synchronisation to Google Product Feed) you should be able to create and launch Dynamic Remarketing campaigns.