End-to-end guide on measuring conversions for Google Ads traffic in WooCommerce shop.
Tracking eCommerce purchases as Google Ads Conversion is crucial for optimizing paid Google Ads campaigns aimed at increasing sales performance of your WooCommerce shop. You can learn more about how this feature work in official Google documentation.
This guide will show you how to achieve it in few simple steps using Google Tag Manager for WooCommerce PRO plugin.
IMPORTANT: preset used in this guide is available only in PRO version of the plugin. It is not available for the FREE version of the plugin
1. Install and configure Google Tag Manager for WooCommerce PRO plugin
First, make sure that Google Tag Manager for WooCommerce PRO plugin is up and live in your WooCommerce shop.
Please check this guide for details.
2. Prepare Google Ads Conversion
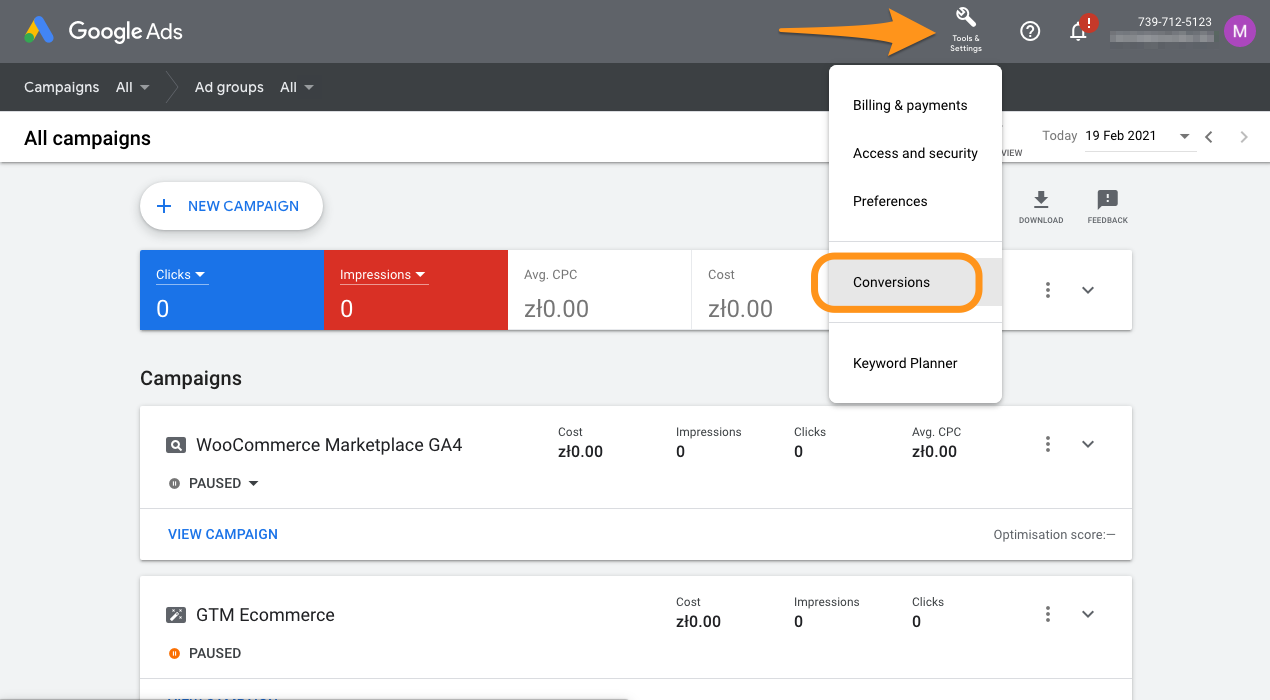
In order to set up Google Ads Conversion, we need to create it in Google Ads panel. Navigate to **Tools & Settings > Conversions** and then click on the "plus" button. Select **Website conversion** .
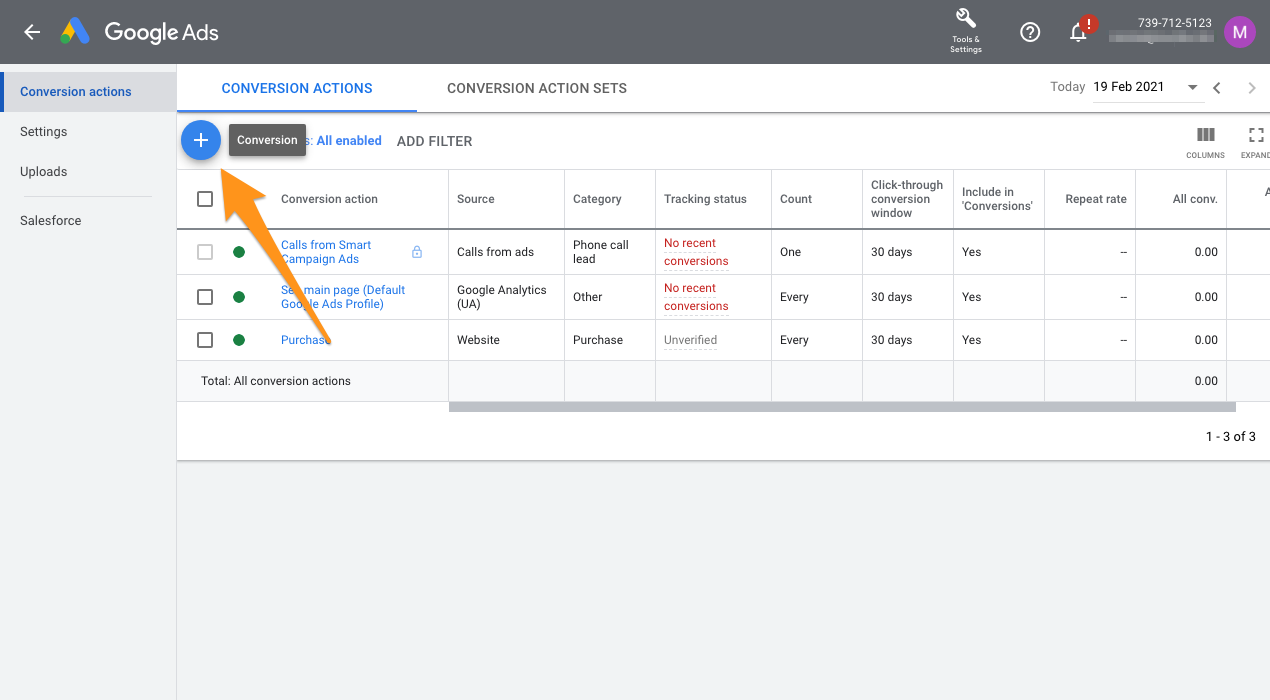
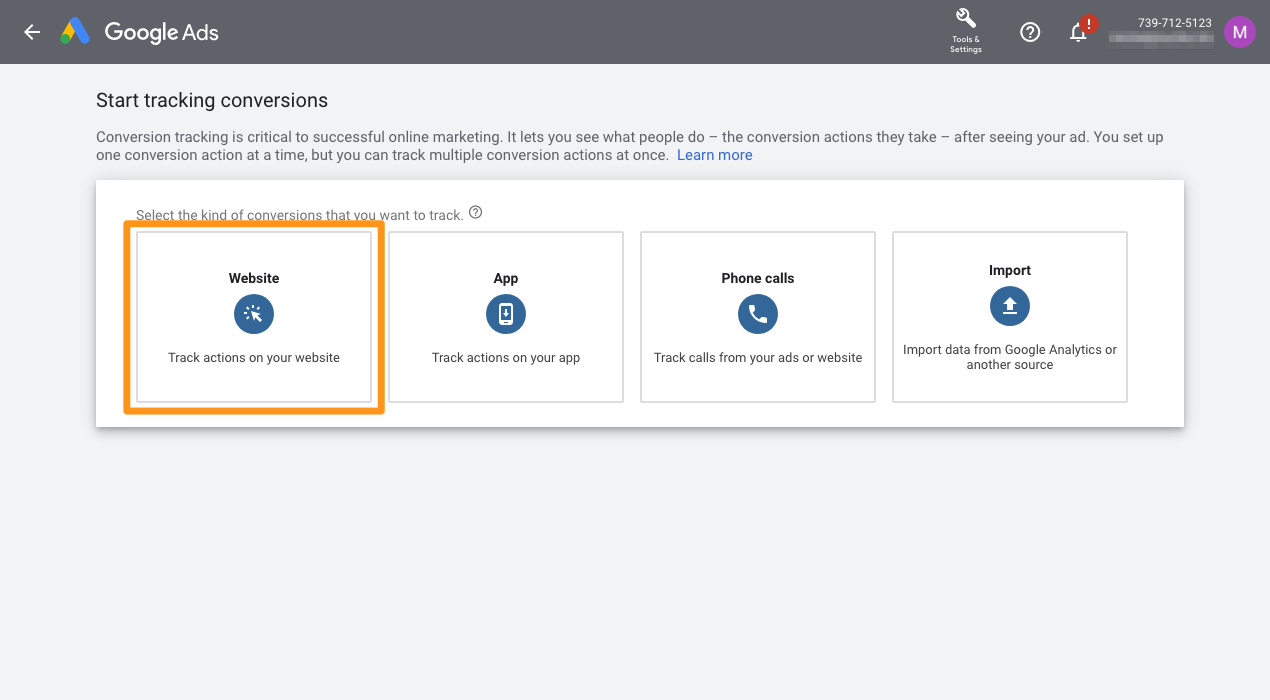
You may need to perform a quick scan of your website, and once this is done scroll down to last box on this screen and click "+ Add a conversion action manually" link:
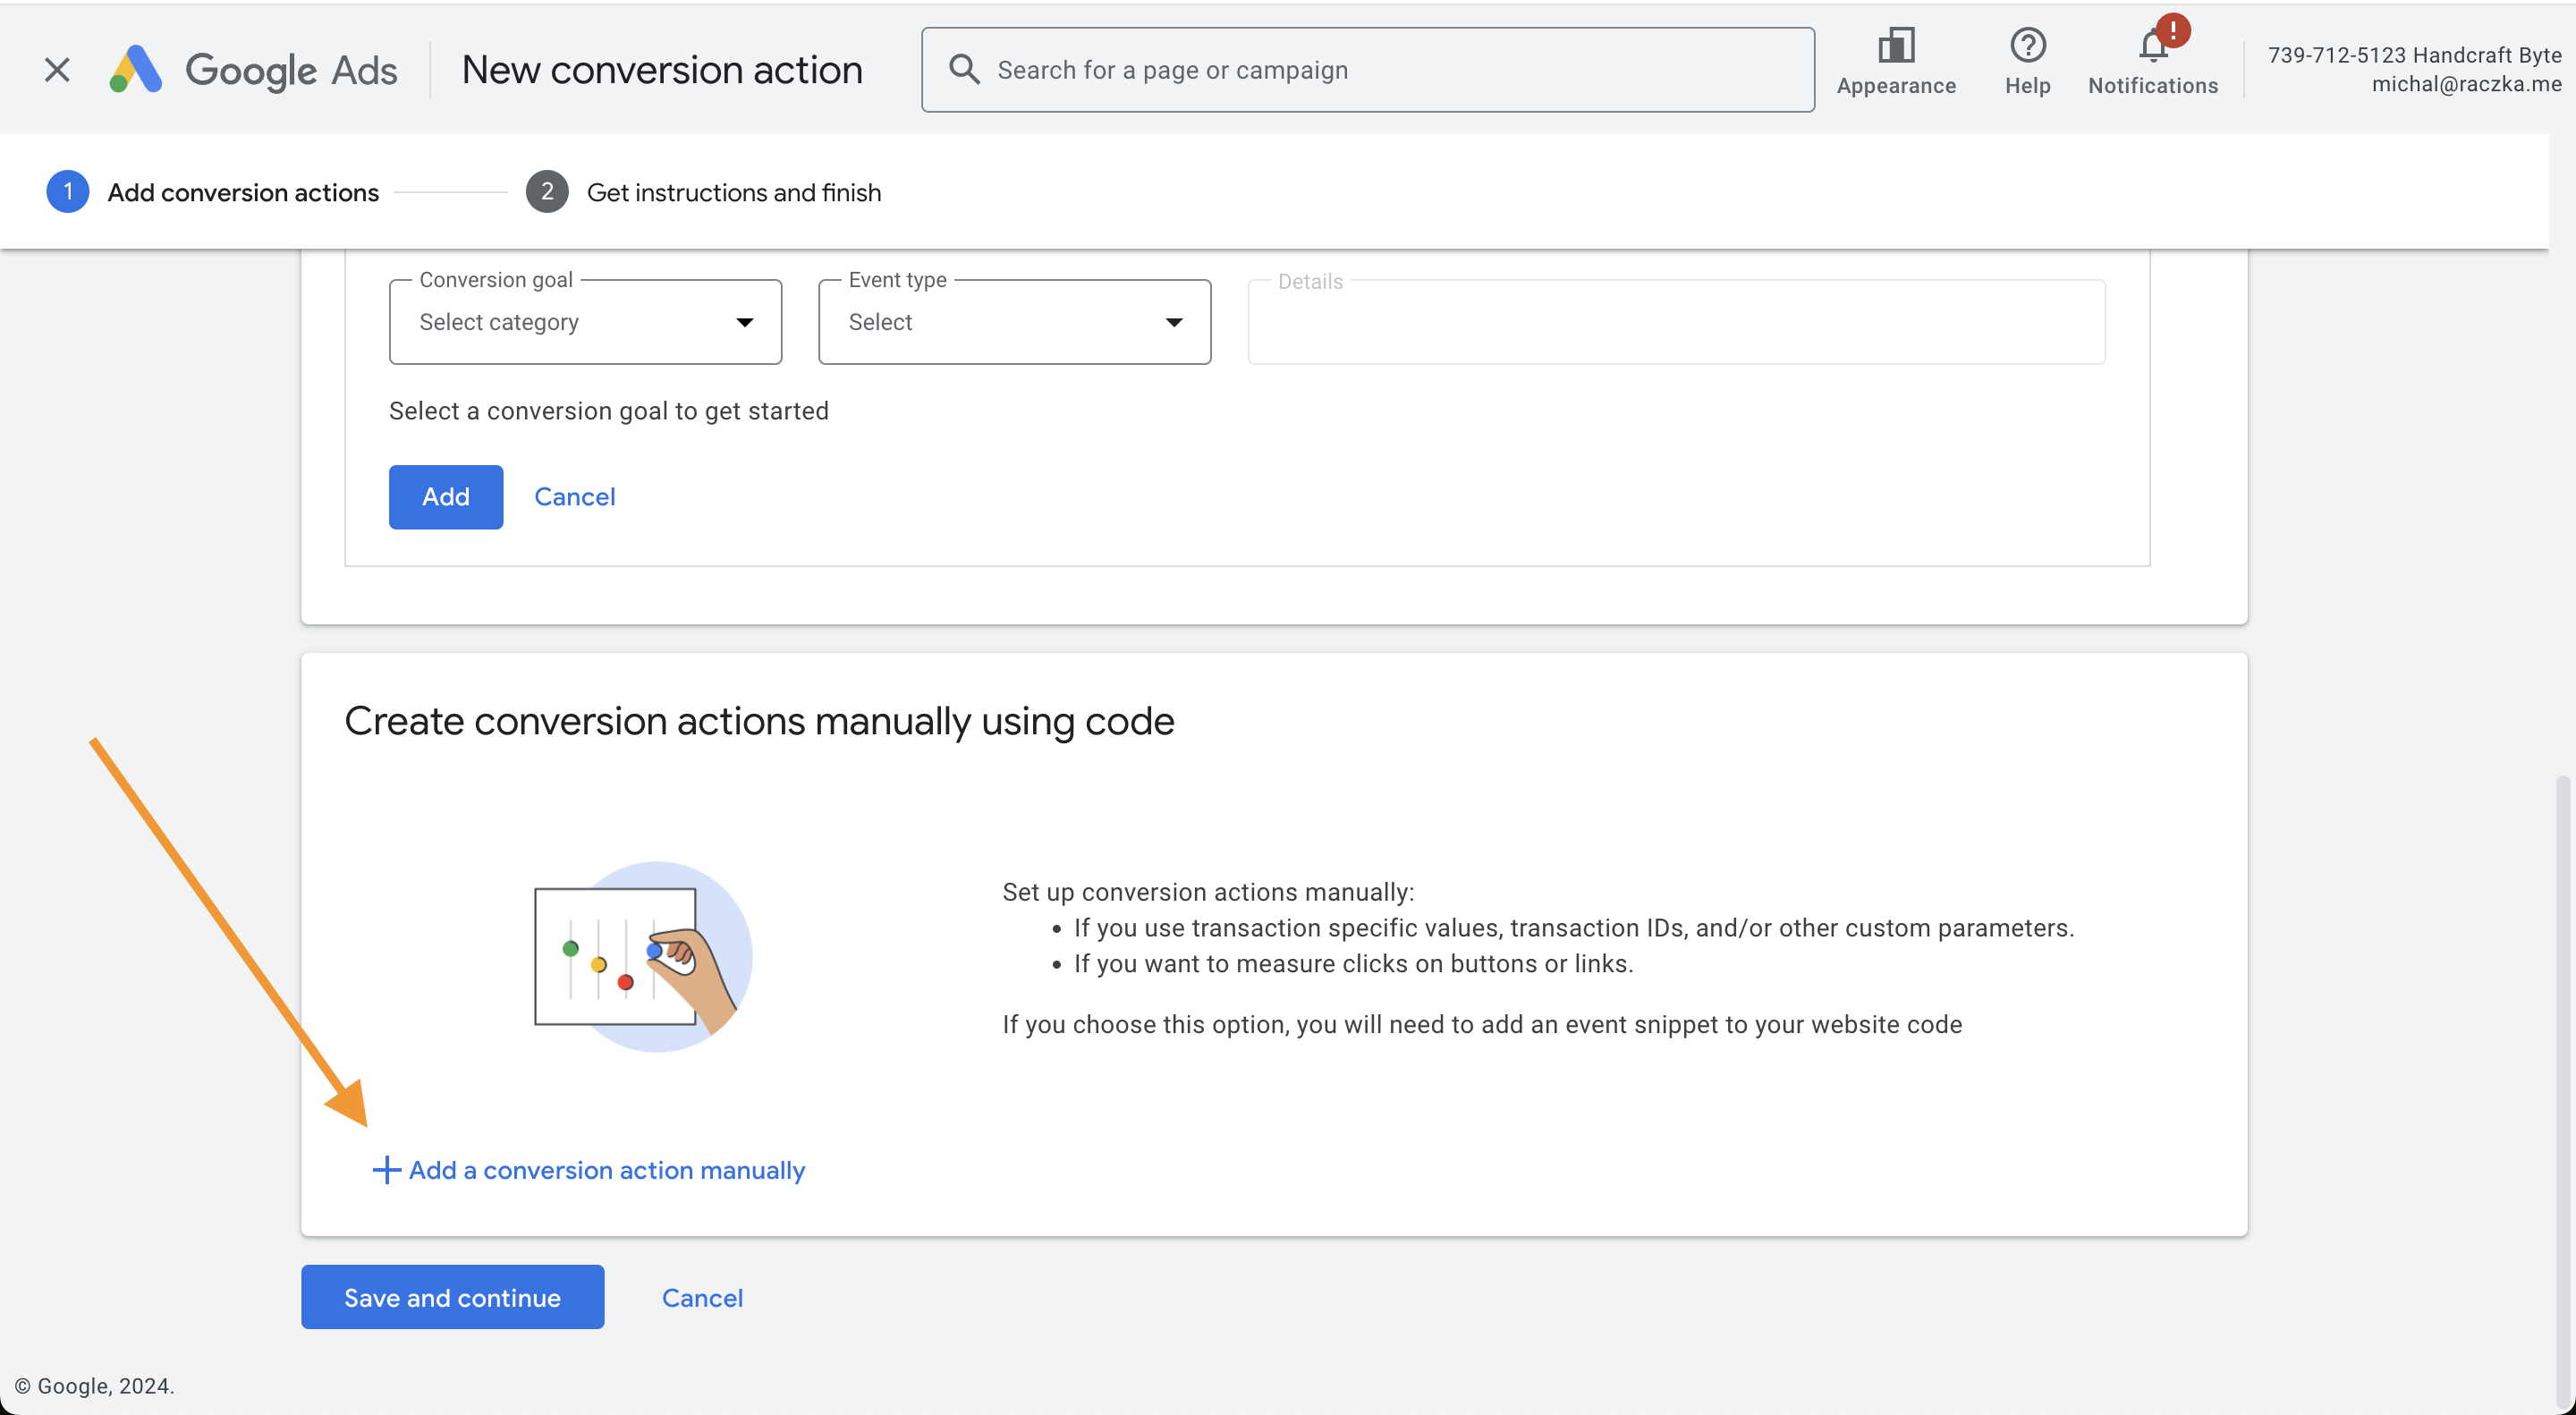
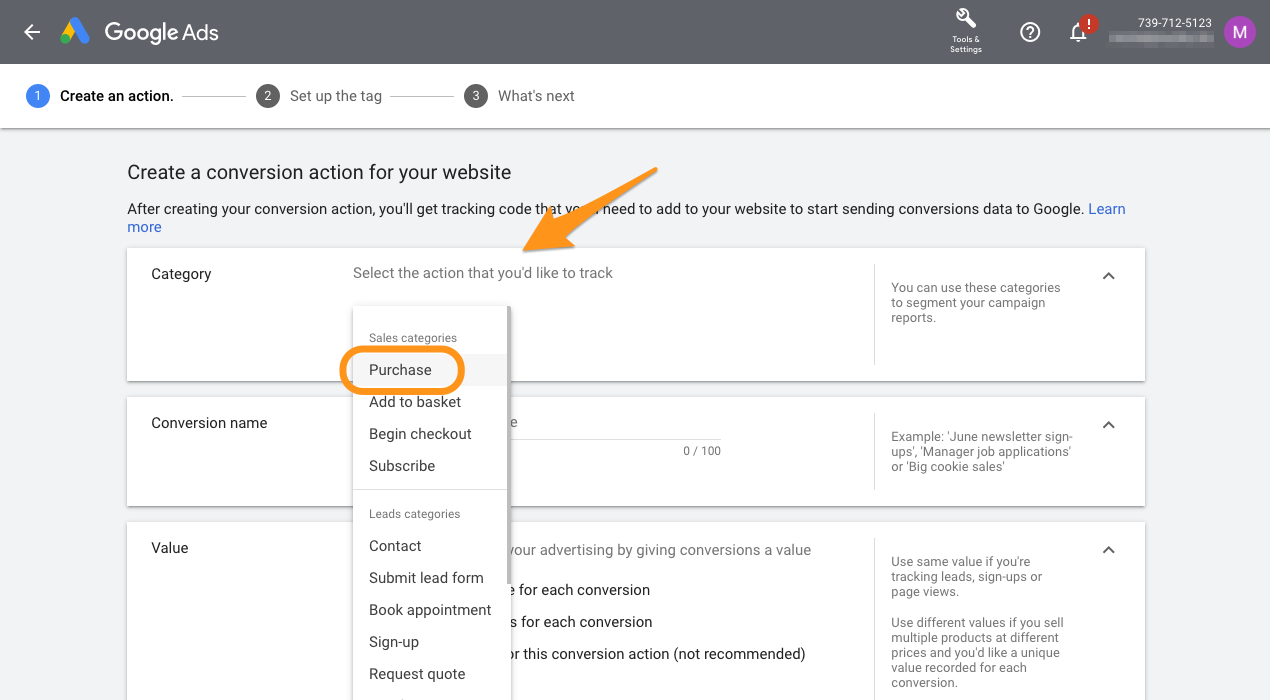
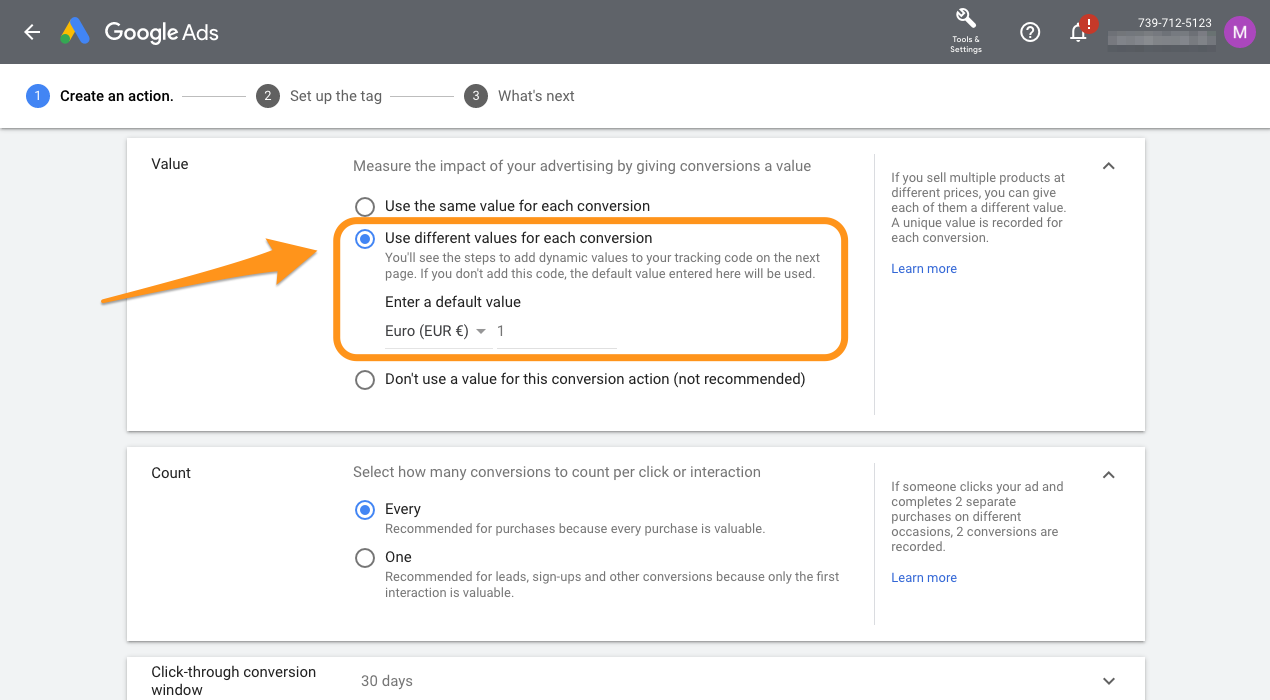
In the conversion setup screen you need to select Purchase in Category dropdown. Then scroll down to **Value** section and select **Use different values for each conversion** . And in **Count** section leave **Every** . These are options that work the best with our preset, but advanced users can adjust them according to their specific needs.
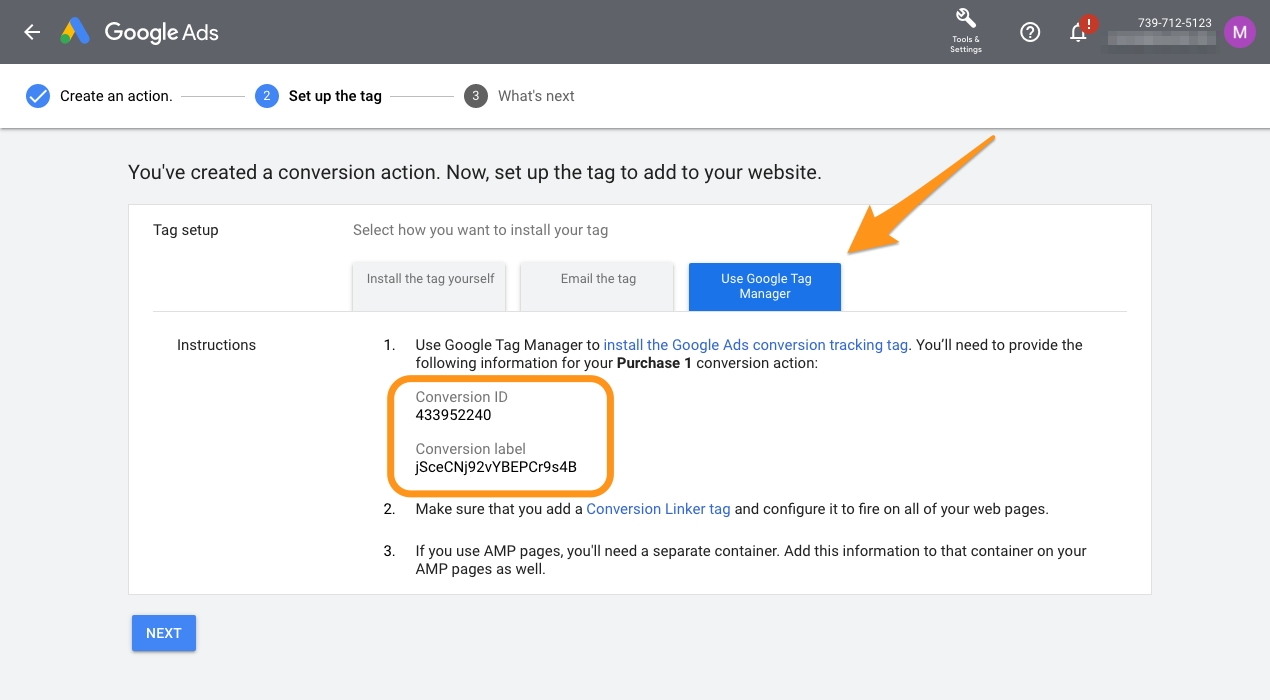
Save the new conversion, you will see a final screen with three options to install the conversion tracking. Select **Use Google Tag Manager** and note down the **Conversion ID** and **Conversion Label** . You will need to use them in next steps. You can alternatively leave that tab open or get back to those values from main Conversion list later.
3. Download Google Ads Conversion preset
After that navigate back to your WordPress instance and go to **Settings > Google Tag Manager** . Then click **GTM Presets** tab to see the library of available presets.. Select **Google Ads Conversion (Advanced)** and click **Download Preset** . That will download and save **gads-conversion-advanced.json** file to your computer.
4. Import Google Ads Conversion preset
The next step is to import the preset you have just downloaded into your GTM Workspace.
Navigate to GTM Workspace and go to **Admin > Import container** . In the new screen select the **gads-conversion-advanced.json** file and your Workspace (usually default one). Next select **Merge** as the import option and **Overwrite conflicting tags, triggers and variables** as the sub-option. It's very important to make sure those two options are selected.
Import screen gives you a quick way to preview all the changes import will make to your workspace. Now you can click Confirm . This will bring the changes as draft so you will have opportunity to review and adjust everything before going live.
5. Update GTM container and publish it!
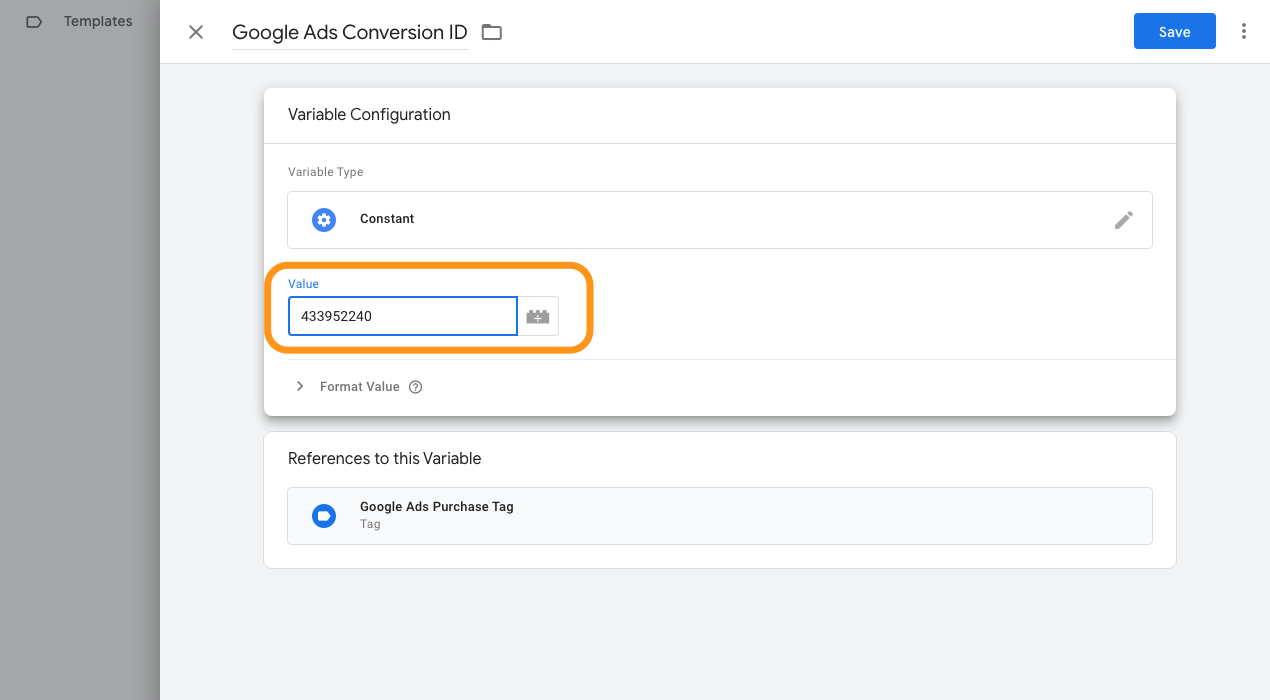
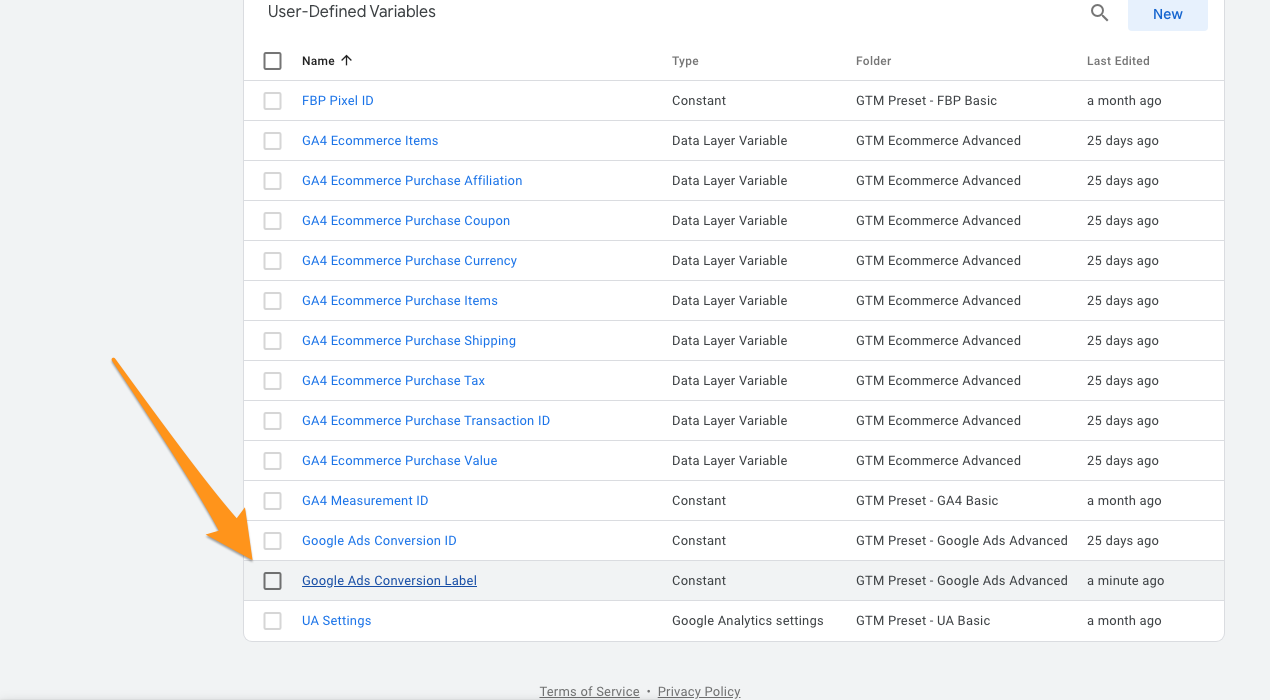
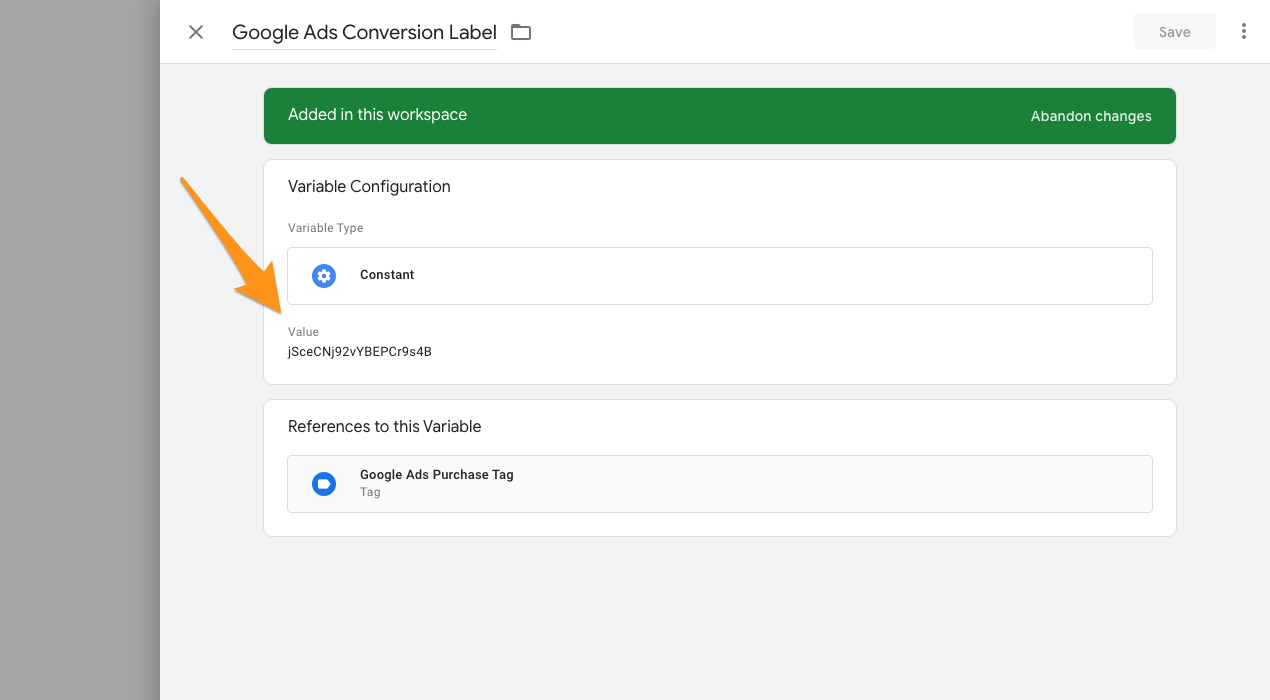
The last step is to paste the Conversion ID and Conversion Label obtained in step no. 2. Those values needs to be filled in two GTM Variables called accordingly **Google Ads Conversion ID** and **Google Ads Conversion Label** . They can be found on the overview screen that shows all the changes you have just imported, or on the Variables list.
First open **Google Ads Conversion ID** variable and edit its value pasting the Conversion ID from Google Ads panel.
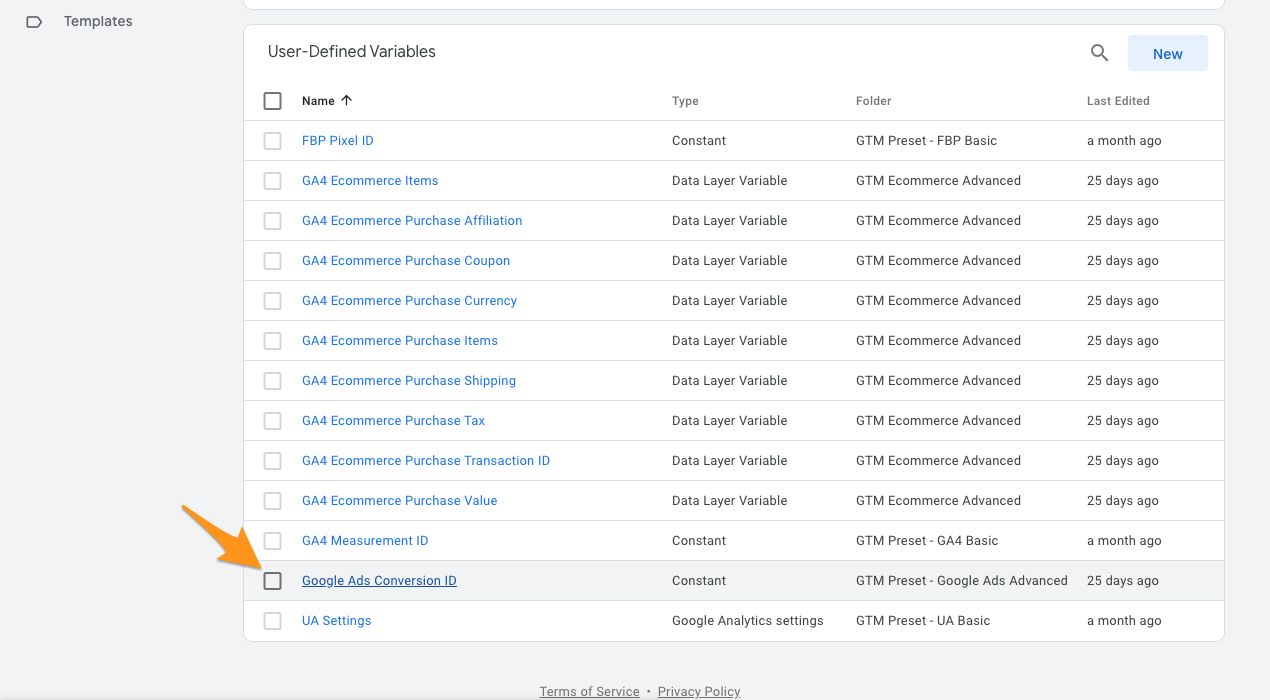
Then repeat it for **Google Ads Conversion Label** .
Once those values are saved you need to publish all changes in your GTM workspace by hitting Submit button, writing commit message describing that you are loading Google Ads preset and then clicking **Publish** .
That’s it! From now on your Google Ads account will receive conversion information that will help optimize and improve your paid campaigns.